Grant Ordelheide is a professional landscape photographer based in Denver, Colorado who spends a lot of his time traveling to beautiful places all over the world taking photos and running workshops. Every location he visits provides an opportunity for incredible pictures but the Grand Canyon is one area that is on his list of favorite spots to shoot, especially when there’s lightning.
Grant describes his love of this immense National Park.
“The Grand Canyon is one of the most incredible natural features in the world. It is one of those places that no matter how many times I visit, my mind is blown each time I look over the rim. It is even more incredible in mid to late summer during the monsoon. The daily storms bring drama to the skies above the canyon, lending itself to ideal photography conditions. If you are patient and a little bit lucky, it is possible to photograph lighting as it strikes the canyon walls.”
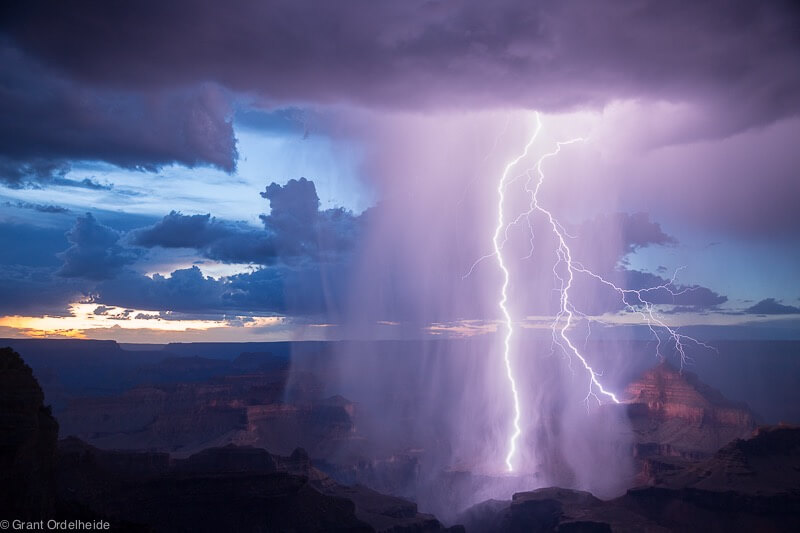
Here are a few really great lightning photos Grant has taken on his trips to the Grand Canyon. He won the My USA category for 2015 USA Landscape Photographer of the Year with the first image featured.
I photographed this storm as it moved across the canyon, heading straight for where I was standing on the South Rim. I was able to make several successful photos, but kept telling myself that I would leave after the next strike. I watched as the bolts got closer and closer. Finally this one hit and after quickly checking to make sure it was in focus, I grabbed my gear and sprinted back to the safety of my truck.
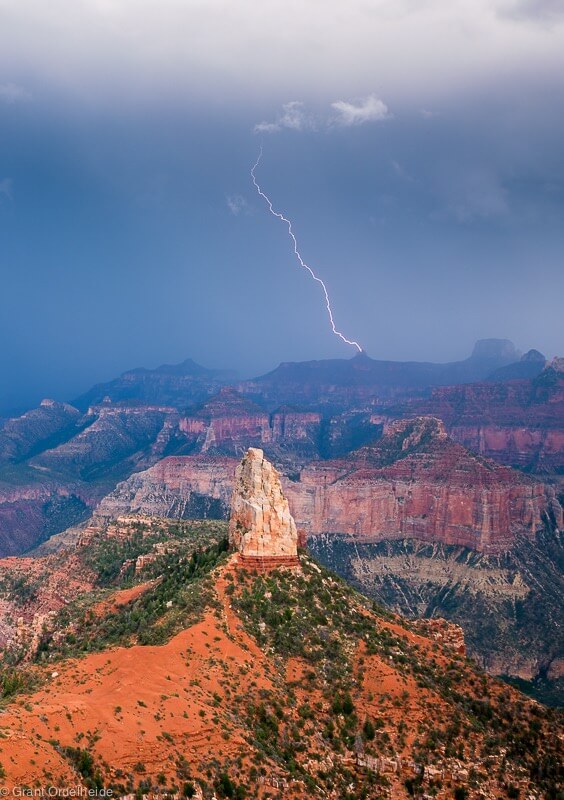
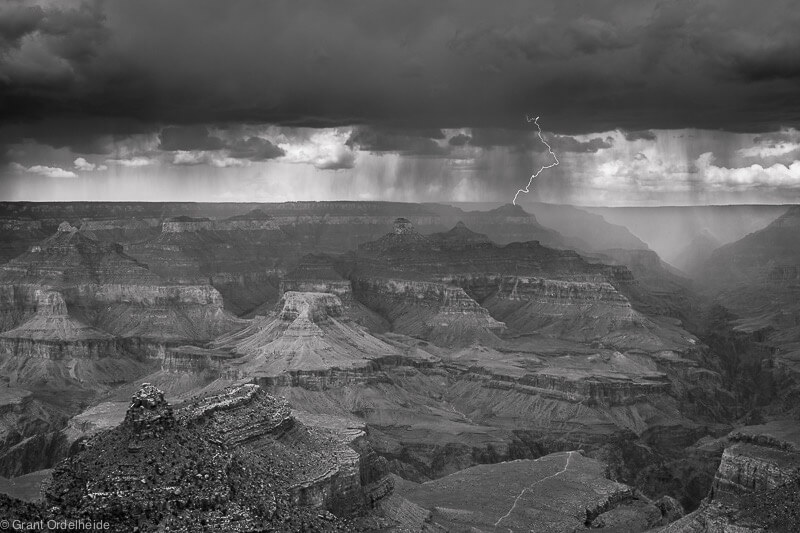
Lightning strike over Point Imperial on the Grand Canyon’s North Rim.
This storm really came together right after sunset. As it moved closer and closer, the strikes were hitting with a greater consistency. This is two frames, taken about 3 minutes apart and then blended to show all four bolts in one frame. This image could also have been made using one long exposure, but I chose to do two shorter ones to keep the clouds from having too much motion blur.
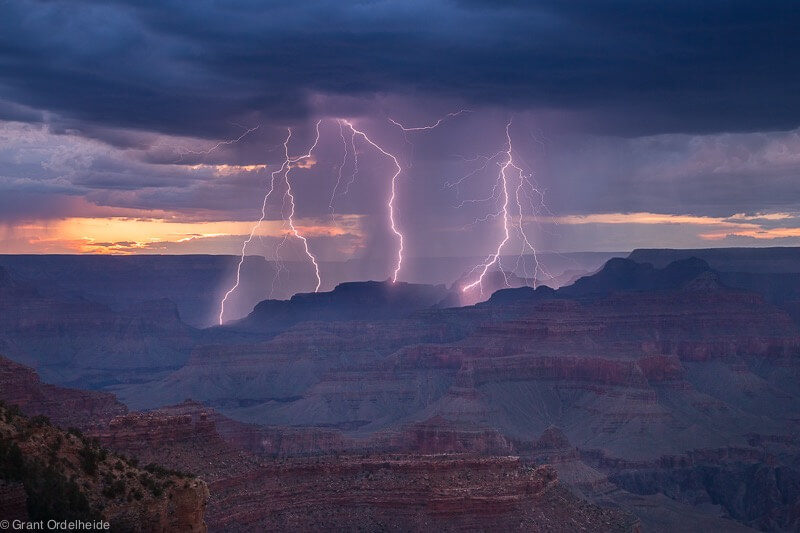
Double Strike on the South Rim of the Grand Canyon.
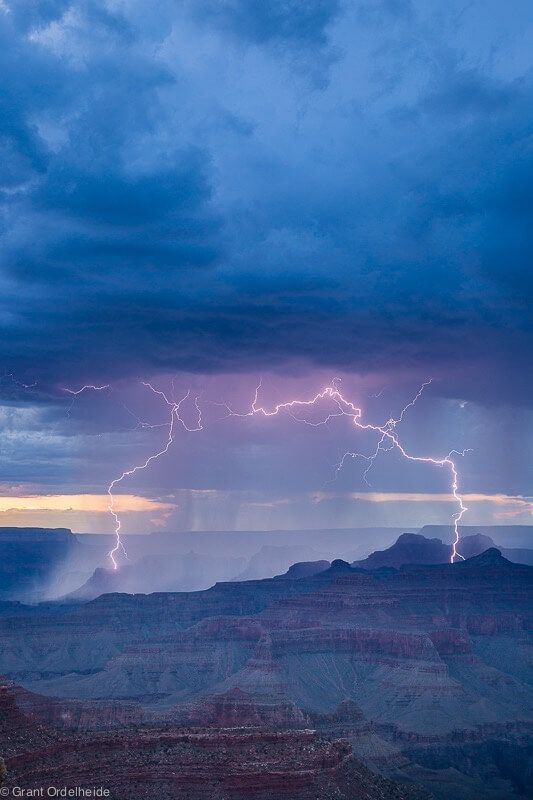
Using a lighting trigger can really increase your odds of capturing a bolt in a photo. In the daytime, when long exposures are almost impossible, a trigger is really key to being able to capture images like this.
To see more of Grant’s photography, check out his website, Facebook, and Instagram.
