Many photographers and photo editors are confused or intimidated by how a Tone Curve works in Lightroom, but it’s really quite simple. The Tone Curve is a powerful tool that can be used to make advanced tonal adjustments on your image. And when you understand the basics of the Tone Curve, you can utilize it in your post processing workflow. In this article, we’ll teach you how to use tone curves in Lightroom as an additional photo editing tool.
What is a Tone Curve?
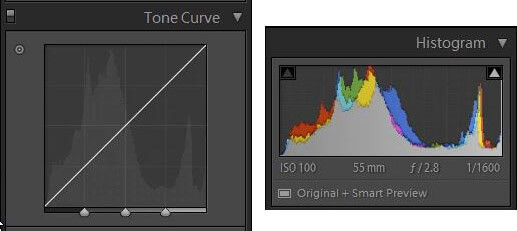
When we look at the Lightroom Tone Curve, we see that it looks very similar to the Histogram. They both graph a visual representation of our image. The difference? What we see in the Tone Curve is just luminosity, whereas in the Histogram also shows us colors.
How to Make Adjustments to Images with the Lightroom Tone Curve
The Tone Curve is similar to how we make adjustments with the Histogram, except instead of dragging the area to the left or right, you pull it up or down (up making it brighter and down darker). If I wanted to increase or brighten my shadows, I simply click on the Shadows section of the Tone Curve (bottom left) and pull up, and if I wanted to darken the Shadows I would drag it down.
What we’re adjusting with the Tone Curve is Luminosity. In the Basic Panel we drag the sliders to the right and left to adjust luminosity, in the Tone Curve we drag the curve up or down to adjust luminosity.
One important thing to remember is that the Basic Panel and Histogram are linked. When we make adjustments in the Basic Panel it affects the Histogram and vice versa. The Tone Curve is separate and will not affect anything in the Basic Panel or the Histogram, and this allows us to have 2 unique ways of adjusting the tones in our image. The tone curve plays a large role in how we have designed our Landscape Lightroom Presets, allowing us to make changes without affecting the basic panel.
How to Use Tone Curve Regions
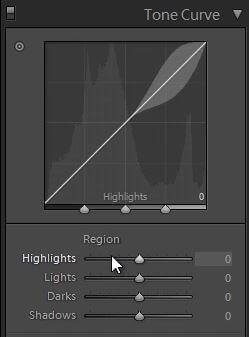
Underneath the Lightroom Tone Curve is the Regions, and here we can adjust Highlights, Lights, Darks, and Shadows. It works similarly to the sliders in the Basic Panel, and when we mouse over a Region’s slider we can see where it’s affecting the Tone Curve.
How to Use the Tone Curve Adjustment Tool
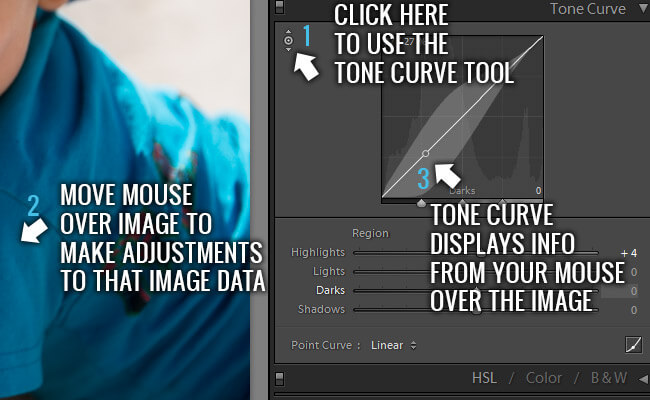
Another quick way that you can edit your image using the Lightroom Tone Curve is through the Tone Curve Adjustment tool. It works similarly to a color picker, you just move your mouse over sections of the image and the tool highlights the area on the Tone Curve where that section of the image is. Then to adjust you just click and drag up or down to make that area of the image brighter or darker.
Custom Point Curve Adjustments
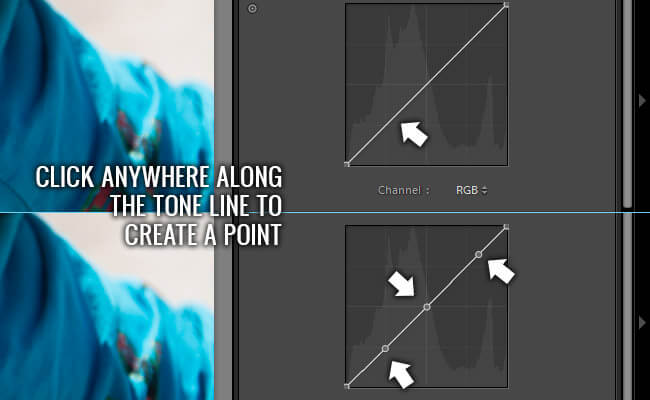
The Point Curve is another tool in Lightroom’s Tone Curve that allows us to make advanced adjustments in our image. The power of the Point Curve lies in the ability to make calculated tonal adjustments to whatever part of the image you want. Creating your custom point curve is as simple as clicking on points along the tone line and then pulling those points up or down depending on if you want that part of the image to be made brighter or darker.
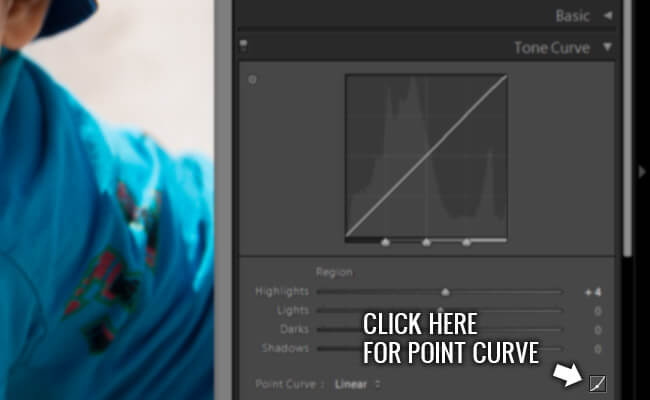
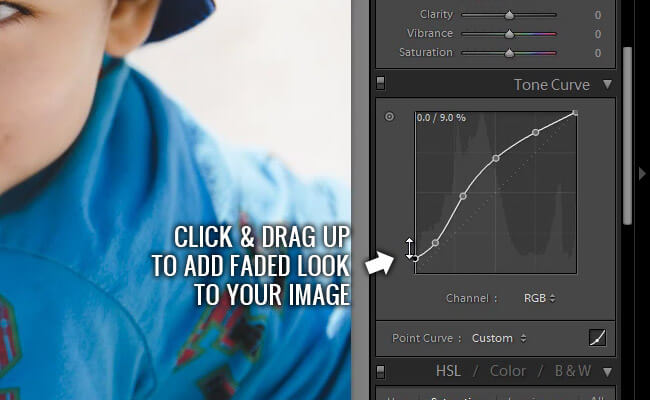
All of the adjustments you make in the Point Curve adjusts the image without affecting the Basic Panel, which is what makes the Lightroom Tone Curve so powerful for artistic processing of your images within Lightroom. For example, let’s give our image a nice faded look.
To do this, simple click on the bottom corner point and drag up. The higher you drag the more faded or washed out your image will become. This is a great effect if you’re going for a vintage style old film look. You can also add more fade by pulling the white point (the one at the very top right corner) down, and this will add more of a fade to the Highlights of your image.
How to Control Individual Color Channels with the Tone Curve
You can get even more advanced than controlling all of the colors equally, using the custom point curve mode you can also control individual color channels for even more control over how your image looks.
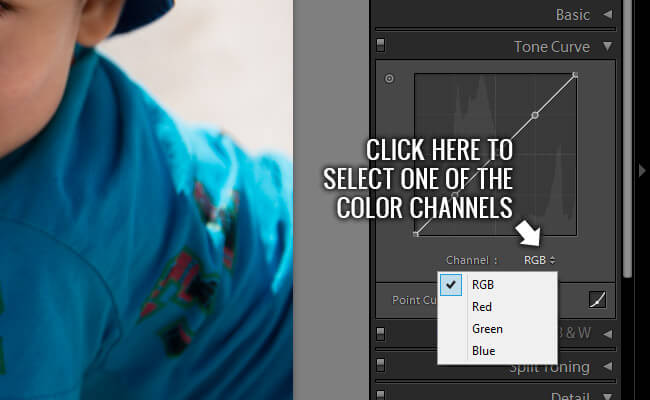
This is an incredibly powerful way to process your images and give them exactly the sort of effects that you were looking for, whether it be imitating a film effect or going for a special vintage look.

As you can see, the Lightroom Tone Curve offers you three powerful ways to process your image in the Region Mode, Tone Curve Tool, and Point Curve Adjustments. You can even take it a step further and modify your Red, Blue, and Green color channels individually for any number of special effects that you may be going for.
