There are many reasons that photographs end up a bit less sharp than desired. Sometimes the subject moves slightly and blurs the scene, but other times it’s something to do with camera settings and the photo setup.
Aperture
One of the first things to consider when taking a photograph is your aperture settings. Aperture usually is viewed as a way of controlling the amount of light entering the camera through the lens, but it also instantly affects the depth of field.
Image by Richard Ricciardi

Aperture is often a very confusing issue to new or novice photographers because it is referred to in somewhat contradictory terms. When it is “stopped down” it means that the size of the opening is very small, but this requires the setting to be numerically high. When the aperture is wide open, the f/stop setting can be as low as 1.4 or 2 on the camera.
When it is wide open the aperture causes a very noticeable shortening of the depth of field which leaves the subject of the photograph in focus but leaves the foreground and background blurry. While this can often be a desirable effect, especially in a photograph where the subject is filling the frame, it is not wanted in such things as landscapes and other shots.
ISO
What can be done if the photographer needs sharpness, but also has to let more light into the camera? A few things can be done to support this need. One of the easiest is for the photographer to bump up the ISO setting. This is what used to be referred to as “film speed”, but in the digital age it means the sensitivity of the camera’s sensor device to the light entering it. The problem with using high ISOs is that they create digital “noise” in the final image. This is a graininess that can often ruin a photograph that is due to be enlarged to any measurable degree.
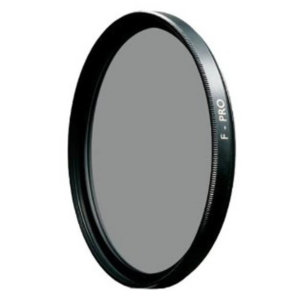
Neutral Density (ND) filter
What if the reverse applies and there is too much light? There are lenses that can help with this sort of problem, and the most frequently used is the Neutral Density (ND) filter. This allows the photographer to create the proper exposure without worries about light intensities ruining the shot. This means that any level of sharpness is possible regardless of the existing conditions.
Manual Focus
Another issue that can cause a lack of sharpness in a photograph comes with the appearance of the many focusing modes. This can cause the camera to lock and autofocus on the wrong area of the image. For this reason a photographer should usually rely on manually focusing for shots that might need a bit more control to obtain.
More Resources
DPS – How to Take Sharp Images
Digital Photography School gives 11 great tips plus many more links to resources on their website to help get your images sharp.
500px – 15 Tips for Getting Razor Sharp Photos
From mirror lock up to removing noise, these tips cover both simple and complex items to help make better images.
Improve Photography – 10 Tips for Sharper Photos
Another great list of helpful tips for sharper pictures.
