In the world of photo editing, sharpening is the tool that you love to hate. It can easily turn your beautiful photo into a harsh, unattractive image if you’re not careful how you approach this. For something so simple, there are many avenues to pursue – but which is best?
Why Sharpen Your Image?
A good question to pose about sharpening is – why even do it? What’s the point of professional photographers sharpening their image if they properly stabilize their camera?
Compact camera users are typically referred to as beginners – meaning those who don’t do much in the realm of post-processing. With that in mind, camera manufacturers have programmed the compacts to auto-sharpen those jpg images – much like how they will bump up your contrast and deepen the saturation level for you.
With digital SLRS on the other hand, you’re getting the RAW image data – that means no saturation, no contrast increase, and no sharpening. People who invest in SLRs are considered on the professional level who actually WANT to do this step themselves – so if you’re not a fan of sharpening right now, down the line you’ll enjoy the versatility and control you have over your photos – believe me, the more control you have over your photos, the better.
High-Pass Filter vs. Unsharp Mask
In respect to Photoshop, there are two mainstream approaches to sharpening your image – using the Unsharp Mask, or running a High Pass Filter over your image.
After receiving much feedback from photographers, it seems that both methods are widely used and has sort of a “Canon vs. Nikon” debate with no real clear advantage on either side. While I generally don’t get into the technical aspects of Photoshop, both methods are different paths of achieving the same goal with minimal damage to your photo.
So I decided to put the two sharpening methods to the test – which are both different from what I normally do with my images. Considering I personally don’t sharpen my photos in either fashion, I found this very interesting to compare.
If you’re looking for step-by-step instructions on how to perform either of these sharpening methods, check out PhotoshopSupport.com for a great tutorial with screen captures.
First, we’re going to compare the high-pass filter to the unsharp mask, and then compare that to how I usually sharpen my photos.
This photo will serve as our sample image:
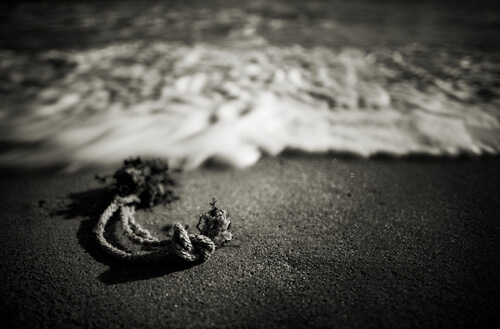
Photo by Christopher O’Donnell
This is the “before” photo – prior to any sharpening. I reduced the size to 1500px on the longest side for the purpose of this test.
Since all images looked virtually the same at this size when sharpened, I decided to zoom in to individual pixels to show the differences.
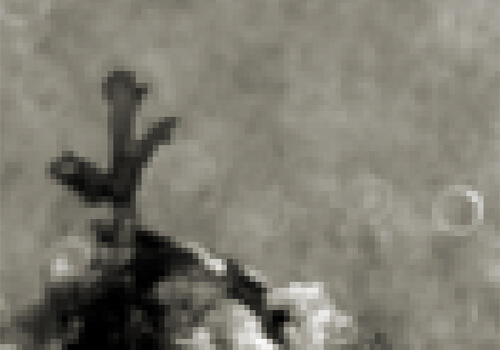
The Original
This is what the pixels look like prior to any sharpening – a bit soft and could use some definition.
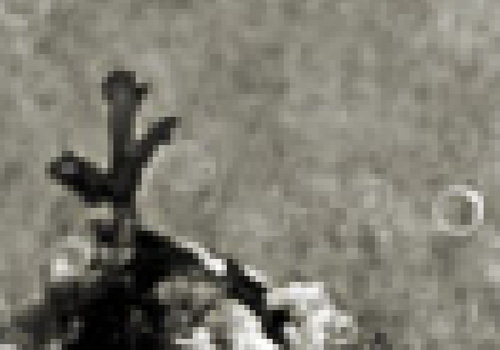
The High Pass Filter
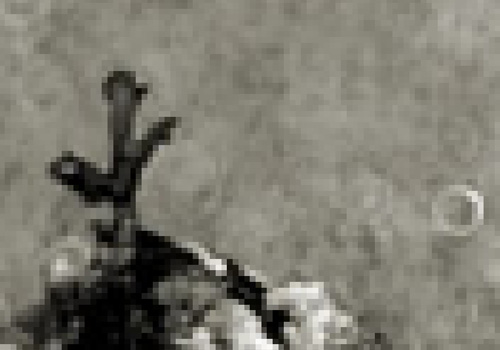
The Unsharp Mask
As you can tell, there is much difference between the original and the sharpened versions. While these examples are open for interpretation, I’ll offer my opinion – I think the high pass filter damaged the image too much when compared to the unsharp mask. You can see more halos and distortion, and the background had more noise apparent.
Based on this test, I would use the unsharp mask to bring out the detail of my photo. Although it looks a bit better than the high pass method in terms of damage and halos, I don’t like how the dark pixels have mutated – it looks a bit as though they’ve gone through too many changes for a simple sharpen.
How I Sharpen Images
Here’s how I use sharpening on my images. I’d like to say that I rarely sharpen my photos for large printing – just for web display – so the method I use is very quick and easy, with great results.
First, I flatten the image and duplicate the layer after resizing. The top layer serves as my sharpening layer – that way I can scale back (lower the layer opacity) or mask out parts I don’t want sharpened (i.e. blurred backgrounds or noisy parts of my image).
Then I select Filter > Sharpen > Sharpen.
Told you it was easy!
Below is the result and – much to my surprise – I actually like this method the best out of the three. The high-pass and unsharp methods just seem too intense and/or changed the pixels too much to my liking.
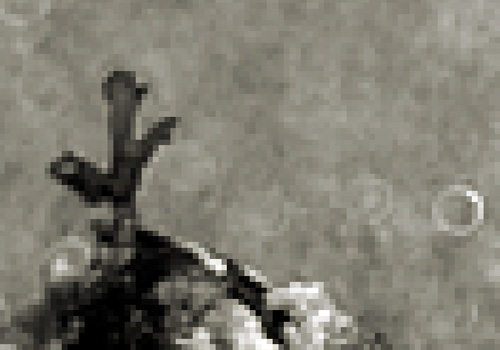
Filter > Sharpen> Sharpen
Now let’s look at the full image that’s been sharpened using my method – like I mentioned before, the changes between the three samples were unnoticeable at this scale so it seemed redundant to post three identical-looking images.
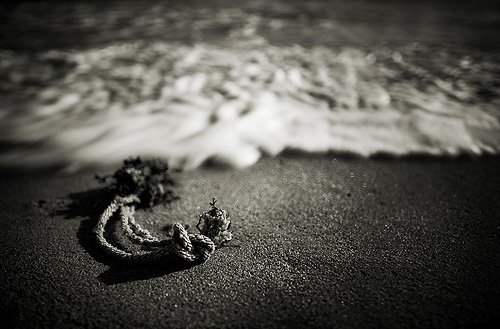
The sharpened image at 1500px wide
Notice how the rope really pops now – just what I was hoping to achieve for web display.
I should note that my quick method will not work too well on high-res photos….anything above 1500px will show little to no changes in sharpening. I typically save my photos for web display under this mark so that’s why I like the simple Sharpen filter. If I was working on a larger scale, I would definitely use the unsharp mask instead.
It all comes down to what you prefer and what you consider “good” or “bad” sharpening – as I said before, these are all roundabout paths to the same outcome – an image that pops a bit more. The only difference I saw between the high pass filter, the unsharp mask, and the simple sharpen filter was when I looked at the individual pixels, which tells me that unless I’m printing on a very large scale, the easiest method works best for my workflow.
Just for a visual – here is an example of the same image, but oversharpened – notice how harsh it looks overall and just gives an unpleasing appearance. If you scale this to individual pixels, you can see massive damage and also a huge noise increase in the out-of-focus background.
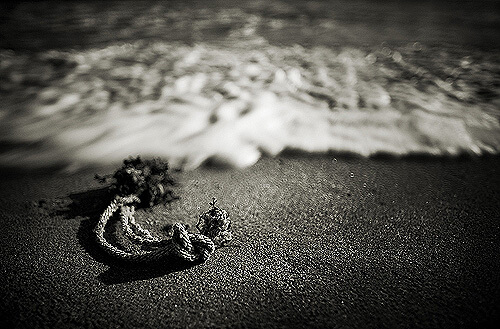
Clearly oversharpened
I encourage you to do a similar sharpening test on your own photos and see what works best for you – a little trial-and-error now can ensure that you’re choosing the right sharpening tool for your images.
Regardless of why you’re sharpening, you should follow a few important steps to ensure that you don’t damage your photo unnecessarily AND to also preserve your original, unsharpened image to revert back to:
1. Always sharpen at the end of your editing.
2. Always sharpen on a duplicate layer – save another PSD if you have to (in fact, I recommend this as you’ll have to flatten your image first before sharpening – not good if you want to keep your layers editable).
3. Zoom in so that you can identify any halos or other damaged areas of your image….it’s much easier to see any unwanted changes when you’re looking at individual pixels and not the image as a whole.
4. Sharpening will do nothing for out-of-focus backgrounds except increase noise and just make it look unappealing – consider masking out these portions of your image.
