Have you been dubbed the “Photoshop Whiz” in your family and have been put in the hot seat to make Aunt Matilda look youthful and vibrant? Or perhaps you are browsing through the shots you’ve recently taken of a client and now realize that the lighting was a bit too harsh. Worry not, because this tutorial will have your photos looking smooth, clear, and give you airbrushed skin that still looks “au naturel.”
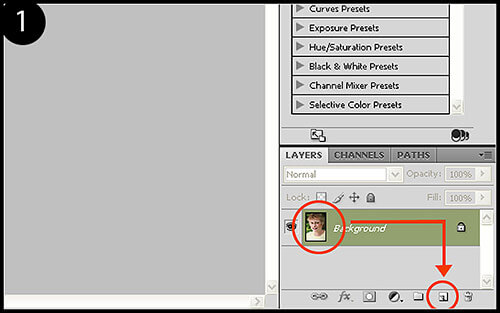
1. With your photo open in Photoshop, duplicate the current layer by clicking Layer > Duplicate. You can also duplicate your layer by simply clicking on the layer thumbnail in your layers palette, then drag-and-drop it onto the “new layer” icon located in the toolbar (Figure 1).
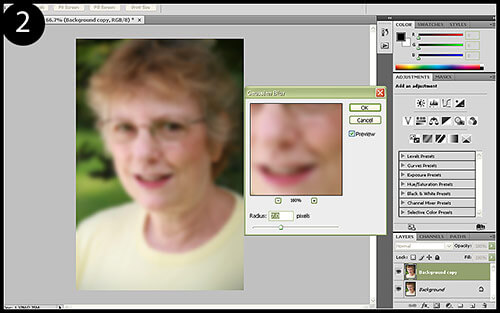
2. Click Filter > Blur > Gaussian Blur. The blur strength will vary by photo size since it is based on pixel count, so no uniform number will produce the same results on every photo. The goal is to blur the duplicate layer as much as possible while still retaining identifiable features (mouth, eyes, etc). Work the slider and try to get the blur as close as you can to Figure 2. Click OK and name the layer “airbrush” on your layers palette.
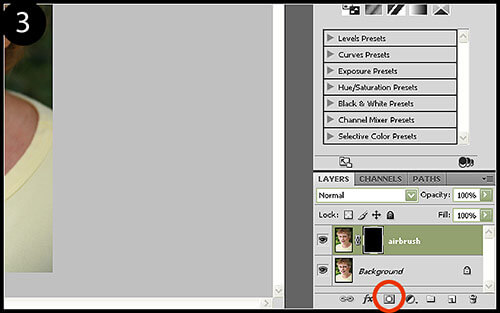
3. We are now going to apply a layer mask to hide the blurred layer so that we can mask out which parts of the face we want to airbrush. While holding down the ALT key, click on the Add Layer Mask icon in your layers palette toolbar (Figure 3).
4. This is where some common sense and an eye for detail goes a long way. If you’re not careful with how liberally you apply your airbrushing, you can easily take your photo down the trail of airbrushing horrors.
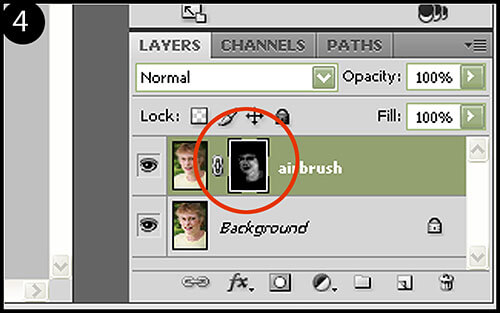
Click on your brush tool (keyboard shortcut : B), then click on the foreground/background color reversal arrow to make your foreground color white. With a very soft brush (one with a hardness of 0%) and an opacity level of around 10% to start, begin to brush around the face to bring out the airbrushed layer. Take care not to brush over the eyes, mouth, jawline/edges of the face, and the outline of the nose. You’ll want to retain these as it would look incredibly unnatural to have gaussian-blurred eyes and teeth. When finished, your layer mask should look something similar to the one seen in Figure 4.
If you think you have gone a bit too far, instead of switching the brush color back to black and deleting your previous brush strokes, try just lowering the opacity for the airbrush layer. It’s much simpler this way and you can bump it back up later if needed.
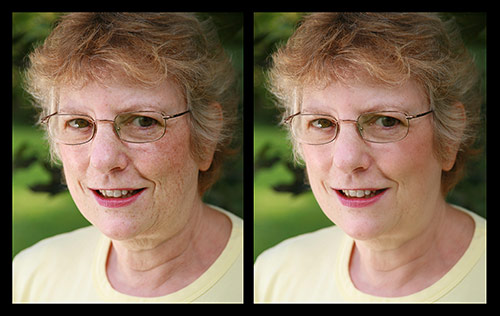
While you may impress people by making a 60 year-old-woman look 25, that goes into the realm of unnatural manipulation, not photo enhancement. The goal is to remove some common aging and skin imperfections while still keeping the photo representative of the actual model.
There you have it! An airbrushed portrait that simply looks enhanced, not altered. Surprise a few clients by adding this finishing touch to your workflow and watch them say what a wonderful job you did.
