What are Photoshop Actions? The easiest way to describe actions is that they can perform Photoshop edits automatically so that you don’t have to. They’re particularly helpful for digital photographers who haven’t yet learned all the ins and outs of PS, yet want to perform pro-level edits to colors, tones, and adjust the overall mood of their photo. It can take quite some time to learn the proper way to use tools in Photoshop (read: how to edit without damaging your image), so actions provide a way to guide you through that learning curve, while taking your photos to a whole new level.
Types of Actions
So you’ve heard of actions….but what can they do for you exactly?
In general, many actions actually replicate dark room techniques that have been adopted by digital photographers…such as dodging & burning, color filters, and cross-processing, to name a few. While you won’t use all of your actions on one photo since no two photos have the same needs…it’s nice to have a good selection of options to use.
In this example, I ran a simple color action using Union Actions “Blue Dawn” filter, which cooled down the photo a bit. Not only are the colors and tones different, but the overall mood and atmosphere have completely changed.
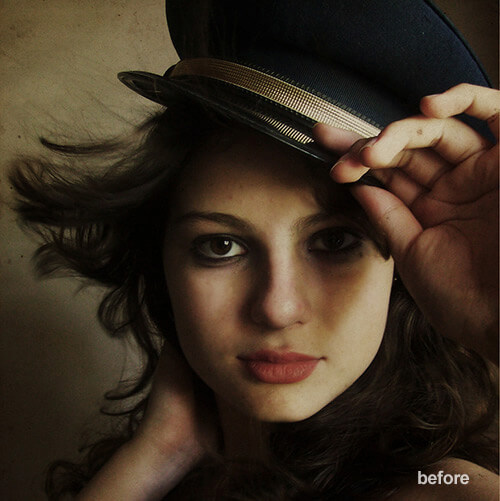
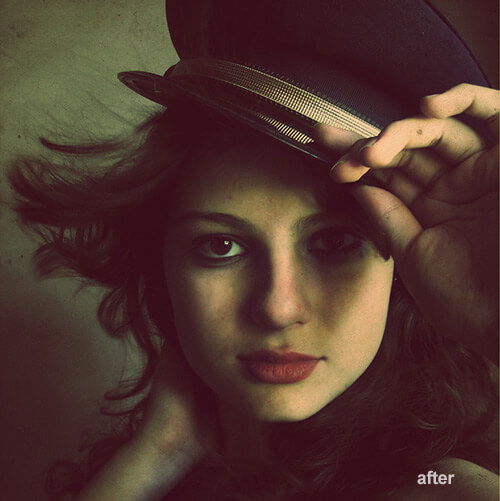
Photo by MahPadilha
Other actions may perform a complicated editing workflow (such as the lomo actions) in a matter of seconds.
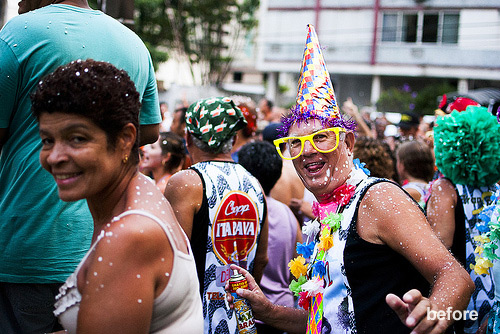
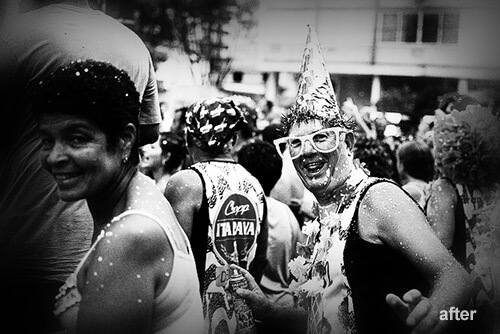
Photo by De Santis
If you’re not completely comfortable with using Photoshop, having an action to run and perform the edit for you is not only a time saver, but will eliminate much frustration and confusion.
How Actions Work
For this section, I’m going going to explain how photographers actually create an action for you, and how you can install that action and use it yourself.
Delving a bit deeper into what actions are….essentially, when you run an action on your photo, you’re literally hitting a play button that will execute the recorded edits – or “actions” – of someone else. In other words, it’s the playback of the step-by-step editing process of the photographer that recorded it. This can potentially condense hours of intensive editing down to minutes – especially if you perform a lot of batch editing for sports, weddings, and other high-volume events. Actions have the ability to revolutionize a photographer’s workflow.
How to Install And Run An Action
1. Purchase and/or download your PS action file to a location easy to find – unzip if necessary.
2. Open Photoshop and find your Action Pallette. You may need to click on Windows > Actions to bring it to the front.
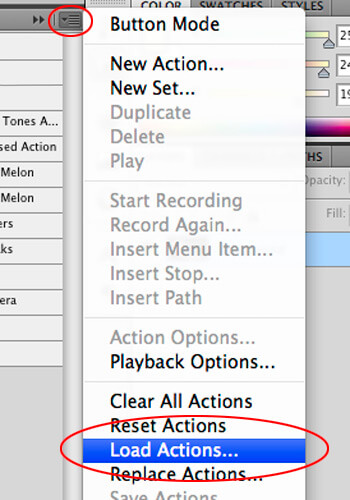
3. Click the options tab and select Load Action. Navigate to where you saved your UNZIPPED action, and click OK.
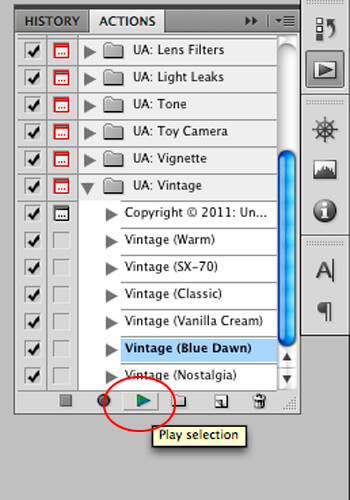
4. Select the new action in your Actions Palette and click the Play button. Depending on the action, you may need to have your top photo layer selected before running the action.
—–
Knowing how to operate your camera is completely different from knowing how to use Photoshop. It’s quite common to find photographers who are brilliant with their SLR, but lack the technical knowledge to complete their vision. Actions also act as a learning tool for Photoshop; they provide a stepping stone that helps you develop your own unique post processing workflow.
While actions are run automatically, you have the option of viewing each individual step that was taken to reach the end result, allowing you to see what each step did to change your photo. For instance, you may not know a thing about curves in Photoshop – what it does, how it affects your colors, at what point will it damage your photo, etc. However, if you could see what adjustments were made to the curves to get that effect…it will help you to learn how curves work by way of example. And then you’ll be able to start manipulating curves yourself and know what exactly it is that you’re doing.
Customizing Actions
While it’s a huge benefit to use actions as part of your editing workflow, there are some drawbacks – mainly from assuming that a specific action will look the same on every photo you apply it to. No worries though – there are ways to customize an action to fit any photo you run it on.
Photographs can have an enormous difference between them – tones, colors, and content are all areas to consider before running your action on them. If you don’t, then you may end up with a photo that looks worse than the original.
For example, say you wanted to add a vignette action on a photo that had a lot of dark tones. That action may decrease the exposure more than it would other photos and end up underexposing parts of your image.
In addition to accidentally damaging your photo, you can also completely change the mood and focus (in a bad way) by not pairing actions correctly with the content. Running an action that adds warm colors to a photo that would look better with blues and greens would not be a good idea (generally). So depending on your subject, actions can both enhance and take away from your atmosphere.
One way to customize your action is to use a layer mask on the action that you’ve just ran. Layer masks themselves are an incredible tool, but are especially helpful when you need to customize an action. In short, they allow you to paint (with your brush tool) exactly where you want the effects of your action to appear, and where you want the effects to show less – or not at all.
An example of when you’d need to use a layer mask on your action is when you’re dealing with tones and color changes because it’s important to be selective on where they appear. A lens vignette action can make some darker tones appear very muddy and underexposed. With a low-opacity brush, you can gently paint over the areas where you want the action to appear less. So now you can lessen the vignette by making it more transparent with the pinpoint accuracy of your brush tool.
What I Use
For my own work, I often use several groups of actions and combine them using layer masks to achieve a complex look. In particular, I’ve found Union Actions to be my top choice for several important reasons – the actions are of top-quality, and are conveniently organized into an independent group layer for easy placement or editing….so you can always alter or temporarily remove your action later on.
Unlike a lot of actions that flatten their effects to your image – making your changes permanent and non-reversible – Union Actions are designed to be customized and manipulated to your liking. For example, instead of their actions being applied and then flattened, they are actually all performed on a new group layer that is completely independent of your photo. This means that you can -at any time – open your Photoshop file and move, alter, or completely remove the applied action. If you decide to mask out a certain portion of your cross-processing action long after you’ve finished with your editing, you can do that.
So not only can actions can simplify your workflow, they can actually be a solid teaching tool as well – helping you navigate through the complicated tools of Photoshop and learning along the way.
