Blown highlights are undoubtedly one of the most annoying side-effects of digital photography. The entire image could be exposed perfectly, yet all it can take is a white building, a wedding dress, or reflections on the water to create blown highlights that are incredibly distracting to the eye. However, if you shoot in RAW format and have Photoshop at your disposal, there may be hope yet for a photo that would otherwise not be usable.
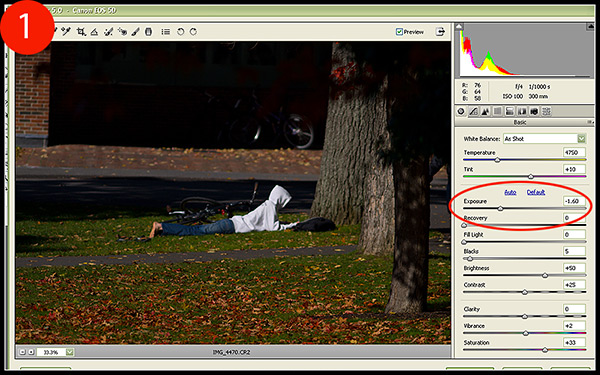
1. Open the RAW file to your photo and edit it how you normally would, correcting the exposure for the overall image, not for the blown highlights. Make a note of any specific settings (saturation increase, contrast decrease, etc) and click Open to load your file into Photoshop.
Open the same file again and input the parameters you wrote down from the previous image (although they should be automatically entered in already). While focusing on the blown highlights, decrease the exposure enough to eliminate the overexposed areas. When finished, click Open.
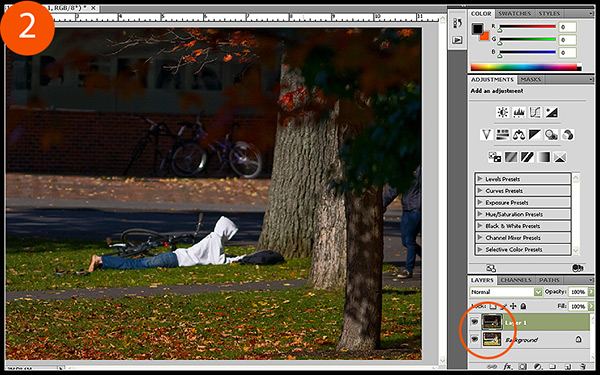
2. Now you will have two separate files open in Photoshop. Select the most recently opened one – the photo where you decreased the exposure – and click CTRL + A to select all (you should now see the “marching ants” along the perimeter of the photo) and CTRL + C to copy. Minimize the photo so that you can access it later if needed, and bring up the image with the blown highlights. Press CTRL + V to paste, and Photoshop should automatically paste the copied image directly on top, lined up perfectly, and onto a new layer (Figure 2).
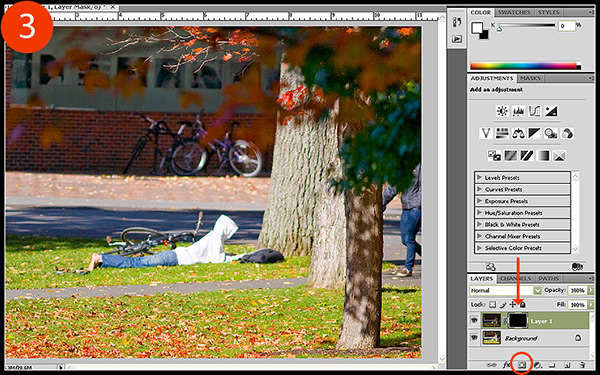
3. While holding down the ALT key, click on the “add layer mask” button on the layers palette toolbar to add a black mask to your new layer (Figure 3). This will block the layer you just pasted in so that we can paint in the decreased highlights gradually over the blown ones.
4. Make sure your foreground color is set to white, then select your Brush tool. Depending on the image and how defined your edges are, you will need to adjust the brush Hardness accordingly. For the hooded sweatshirt, I am going to use a Hardness level of 30%, and adjust my opacity to 40% as a starting point.
With your new layer mask selected, begin to brush around the overexposed area to bring out the darker highlights. Take care to not “color outside of the lines” so to speak, as you will have unnatural looking shadows that will give your subject a dark glow. If you make a mistake, you can always switch your foreground color back to black (keyboard shortcut : X, but only if your background color is set to black as this shortcut simply switches background and foreground colors) and delete your brush strokes.
For this example image, I decided that not only is the white sweatshirt overexposed, but the tree trunks and foliage in the foreground look a bit too bright as well. With a large, soft brush, I passed over these areas once or twice to decrease the exposure a bit, making it more pleasing to the eye.
While this technique has the potential to repair blown highlights, it is not a miracle worker. RAW format gives you a wonderful advantage over jpeg and other formats in the exposure correction area, but can only typically increase or decease the exposure by 2 full stops, maximum. If you’ve overexposed an area by more than 2 stops, then your photo could quite possibly be outside the realm of exposure correction. You still, however, have other more advanced options, such as literally painting in colored pixels over the blown areas if you dabble in digital artistry. At the very least, this tutorial is guaranteed to improve the blown highlights on your image and lead it down the path of becoming a workable, presentable photo.
