Bird photography offers a thrilling and rewarding opportunity for photographers of all levels to connect with nature and practice their craft.Whether it’s capturing unique migratory patterns, observing small changes in species behavior over time, or simply finding beauty in the details of everyday wildlife, bird photography can help us better appreciate and understand our avian friends. In this article, we will go through 4 helpful bird photography tipson how to take great photos of birds. With some patience and practice, you’ll be taking stunning images that capture the beauty of these creatures in no time!
So, without further ado, let’s dive right into it!
1) Choose the right Camera Settings to photograph birds
It is very important to choose the right camera settings when it comes to any type of photography, especially bird photography. This is crucial because as a bird photographer, you are, most of the time, trying to capture an instant that won’t last much.
Therefore you need to have the best conditions to photograph birds as fast as possible and at the best quality you possibly can.
RAW Format

Choosing the right format to shoot will open incredible possibilities when it comes to post-processing. The two biggest formats we can select on most of the cameras available nowadays are RAW and Jpeg.
RAW format in photography is one of the most powerful and useful tools available to photographers. It allows capturing images with a much higher level of detail and dynamic range than other camera settings. RAW files are essentially digital negatives that contain all the data captured by a camera’s image sensor, including color information, light intensity, and other data.
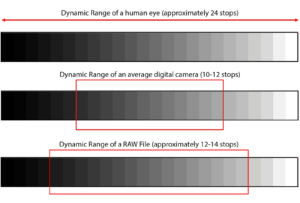
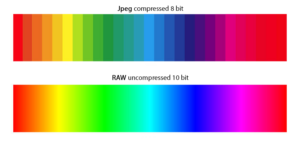
Unlike many other camera formats, RAW files are not compressed or altered in any way. This means that there is no loss of quality or fidelity that can occur when converting from one file type to another. Instead, we can make adjustments to each individual photo as desired without sacrificing quality or risking to damage the original image.
You also have more options when it comes to post-processing such as adjusting exposure, white balance, and color saturation without degrading the image quality. This is extremely helpful when it comes to color since you have all the information with no compressions.
The downside is that RAW files tend to be larger than other types of files and take up more space on memory cards or hard drives.
The flexibility and control that comes with shooting in RAW make it an ideal choice for professional photographers who want absolute control over their images.
Shutter Speed, Aperture & ISO
Of the three camera settings that form the exposure triangle – shutter speed, aperture, and ISO – shutter speed has the greatest impact on image sharpness.
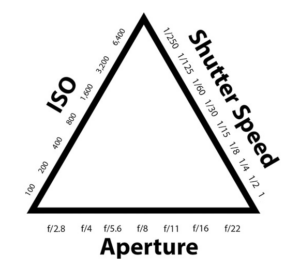
As a rule, for crisp pictures of birds, select a fast shutter speed that is as quick as possible in relation to the situation. Slow shutter speeds cause motion blur, which is the major cause of soft images and can therefore make it difficult to properly focus on a subject.

Which shutter speed to select depends on the size of the bird and what it is doing. Small, active species obviously need a faster speed than large, ponderous ones. Speeds such as 1/1000 second or faster can freeze the motion of most species.
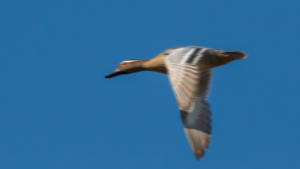
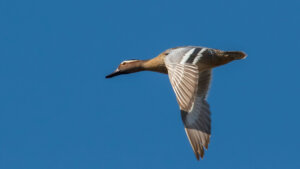
A rule of thumb to keep a photograph in focus, and not have motion blur, if you are using a telephoto lens, is to set the shutter speed as 1/focal length. So for example, if you are using a zoom lens and your focal length is set to 100mm, then the minimum shutter speed you want to use in order to have the image in focus and without motion blur is 1/100.
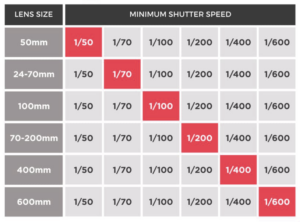
The aperture setting determines the depth of field: the zone between the nearest and farthest areas of the subject that appears sharply focused. Depth of field alone cannot make up for image softness caused by failing to acquire focus on the bird’s face and/or eye in the first place, or from using too slow a shutter speed.

Choosing the right aperture is essential if, for example, we want to keep two birds that are not on the same focal plane, in focus. There is a free tool that you can use to calculate the depth of field you will have based on focal length, f-stop (aperture), and distance from the subject.
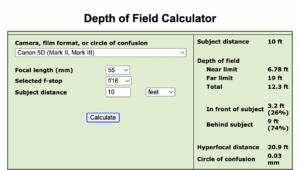
This is extremely helpful because it gives you a precise information and will allow you to choose the right aperture and therefore the right depth of field.
Last but not least, we have ISO. Many photographers think that they can achieve a larger depth of field by cranking up the ISO and balancing the exposure. This noise appears as graininess, especially in smooth-toned or dark areas of an image. Noise lowers image quality by degrading fine detail and decreasing sharpness.

If a camera has a Dual Native ISO (for instance 800 and 2500) then if we choose to set the ISO to the highest native one, we won’t have any noise problem and the image will be as crisp as having the lowest setting. This happens because the manufacturer balanced the whites and the blacks on two different ISO levels, making it perfect to shoot in normal light conditions and in low light conditions.
2) Experiment with different lighting conditions and take great bird photos
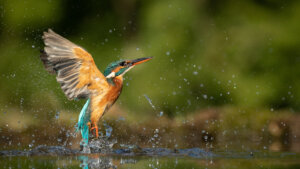
The ability to understand and evaluate a variety of natural lighting conditions in the field is among the most essential skills a bird photographer must develop.
Rather than limit your photo forays to clear, sunny days, go out and shoot under a variety of lighting conditions, paying close attention to how the light affects your subject in terms of color and contrast. Experiment with light quality and angle, and you’ll discover how to go beyond conventional imagery, using light to influence the mood of an image and allowing you to express your creativity.
Light Quality
Light quality varies with the time of day and weather conditions (sunny, cloudy, etc..). At one extreme, the light on a cloudless, sunny day is hard and strongly directional.
Under clear skies, the optimal times for bird photography occur at the ends of the day when the light is at its softest. Birds look best in the sweet light of early morning, at sunrise or for an hour or two after sunrise, and in the golden glow of late afternoon for a couple of hours before sunset.
Light Direction
In addition to being hard or soft in quality, light has direction. The angle at which the sun strikes the subject greatly influences its appearance.
When the sun is shining from directly behind the photographer, this is called front lighting and it is the standard illumination used to capture the majority of bird photos.
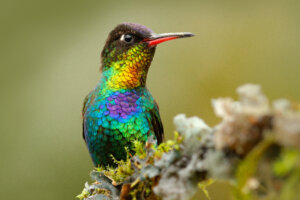
When illumination comes from the side, the bird is no longer evenly lit: one side of its body is in shadow. Side lighting is most effective when the sun is fairly low in the sky.
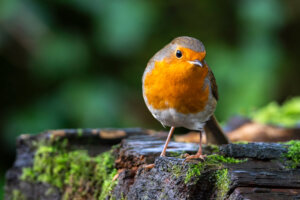
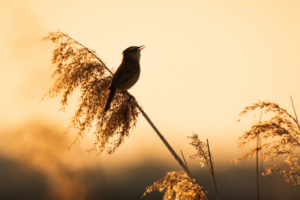
When the light is right behind the subject, it is called backlight. This type of lighting works great in bird photography because it enhances the texture and shape of all the feathers, crests, etc…
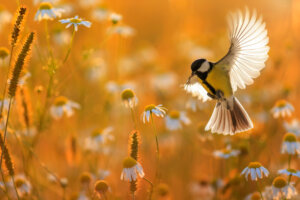
This is a very specific lighting style when it comes to bird photography because it highlights the edges of a bird, keeping the front a little bit underexposed. It is something that might be easily fixable in post if you have exposed it correctly, but it is definitely something to be aware of if choosing this lighting.
Mixing a strong backlight with enough ambiance light as well can create a beautiful silhouette effect. This type of lighting is achieved by exposing for the surroundings and intentionally underexposing the subject.
3) Use Prefocus to capture flying birds
One of the most difficult tasks as a bird photographer is to get the bird in focus. Obviously, if the bird is flying we can’t use the autofocus because it won’t be fast enough to lock the subject, focus, and shoot.
The best technique to use in my opinion is the pre-focus technique.
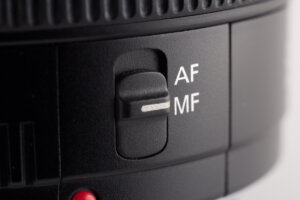
This technique is probably the most efficient one to get most of your photographs in focus. It simply consists in focusing on a specific point and waiting until the bird goes there.
You should focus on a spot where you expect a bird to land, wait, and then press the shutter when it flies into the frame. It’s perfect for situations where birds regularly fly to a precise, predictable location such as a perch, food source, or nest site.
Two concepts that come in very handy when we talk about focus, are depth of field and hyperfocal distance.
We already discussed above about depth of field and we saw how a higher f-stop can actually help you to have more in-focus space and therefore more chance to get birds in flight in focus.
Another concept to absolutely understand is hyperfocal distance.
The hyperfocal distance of a lens represents a special case of depth of field in which objects at infinity as well as the nearest possible objects are photographed with acceptable sharpness.
Therefore, if a lens is focused at the hyperfocal distance, all image points between one-half that distance and infinity will be acceptably sharp.
So, keeping the example we did above talking about Depth of Field, if we calculate the hyperfocal distance and it is 21 feet, it means that if we set the lens to focus on 21 ft, everything beyond this distance will be in focus.
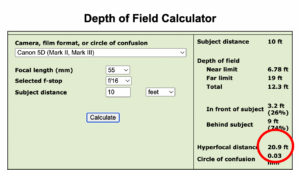
There is a specific formula to calculate the Hyperfocal Distance but nowadays we have tools that can easily calculate it for us.
4) Pay attention to flight paths and patterns
A simple way to maximize your photography excursions is by noticing birds’ predictable flight paths and activity patterns.
When you visit a new site, such as a busy seabird colony, at first you can’t decide where to point your lens due to all the birds flying in all directions. But birds are creatures of habit. Colonial seabirds often use consistent flight routes to and from the colony.
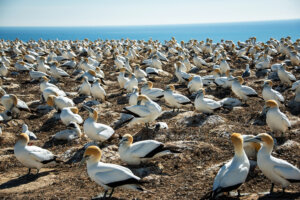
Watch a single bird for a short time and a predictable pattern will likely emerge that will help you determine where to best position yourself.
Choose a spot with a good, all-around view of the surroundings and with a clean background.
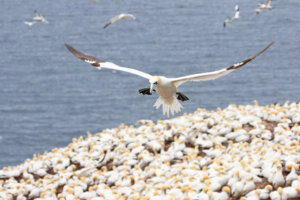
Another aspect to pay close attention to is the wind. Flight paths often change from day to day depending on wind direction.
Conclusion
In conclusion, bird photography is a great way to combine your love of nature with the art of photography. With practice and patience, you can create stunning images of birds, capturing incredible moments.
You will find that experimenting with the different tips and strategies we discussed in this article will help you tremendously.
Remember to always respect nature and your fellow photographers while engaging in bird photography activities.
Be patient, take your time and, most importantly, have fun!
