Capture One is one of the most powerful RAW image editing apps. Yet, many pro photographers are not aware of the hidden features and capabilities of this app.
For example, did you know that you can completely change any color on your image using Color Editor Skin Tone? From this post, you’ll also learn how to copy and apply adjustments in a single click, add additional filters in Capture One, apply warm-cool contrast with luminosity masks, and adjust lightness for better color grading. These capture one tips will help you achieve incredible results in minutes!
What is Capture One?
First off, what is Capture One? Capture One is a professional image editing software developed by Phase One. It is designed for working with RAW files from digital cameras, as well as TIFF and JPEG images. Capture One offers features such as color correction, exposure adjustment, white balance, sharpening, and noise reduction. In addition, it provides a wide range of creative tools for enhancing photos. Capture One also supports tethered shooting, which allows users to connect their camera to the software and remotely control the shutter. This can be useful for fashion and product photography, as well as for capturing high-quality images in difficult lighting conditions. Overall, Capture One is a powerful and versatile image editing software that can help photographers to achieve great results.
How do I know These Tricks?
I’m Alexander Svet, Capture One expert and the author of the new ebook Capture One Hidden Features:
Capture One Hidden Features is a collection of more than 200 pro hints to improve your Capture One workflow, structured into an easy-to-read book.
In this post, I’ll share my top 5 favorite features from the book.
You can get 10% OFF the full eBook and all the eBook bundles with this code: PA10
5 Capture One Tips You Didn’t Know About
Let’s jump into the 5 Capture One Tips you didn’t know about, starting with one of the most under-appreciated features of Color Editor Skin Tone!
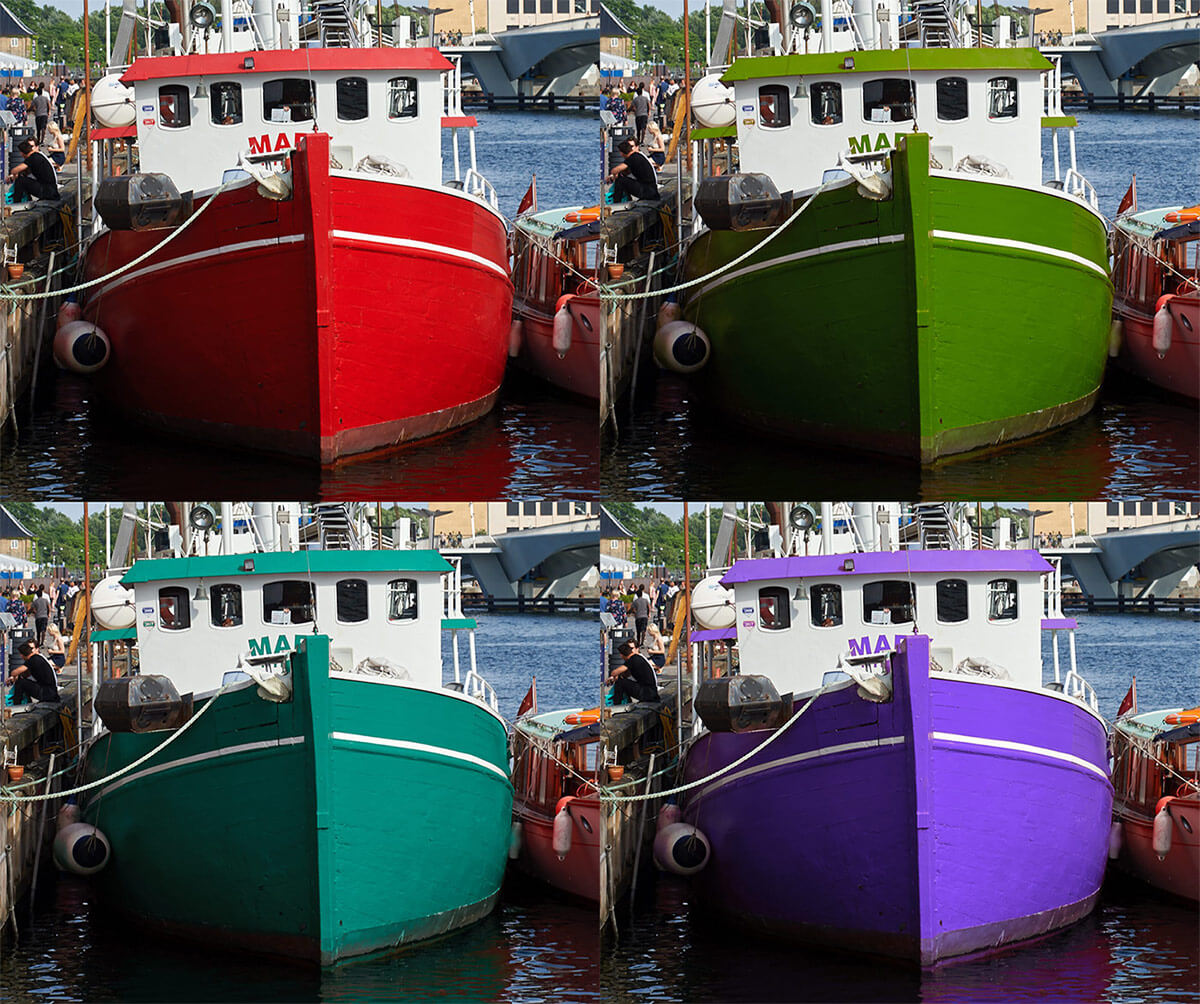
5. Complete Color Change in Capture One
You can use Skin Tone in Capture One to completely change any color on your image!
Simply mask the object you would like to adjust. Next, select the whole color wheel in Skin Tone and set Hue Uniformity to 100.

Now you can quickly modify color just by moving the small dot on the color wheel:
4. Add Additional Filters with the Alt Key
Filters in Capture One is a great tool to navigate through thousands of images in your archive. By default, you can filter images by any single characteristic (rating, color tag, format, date, camera settings). Using the Alt key, you can set several filters simultaneously.
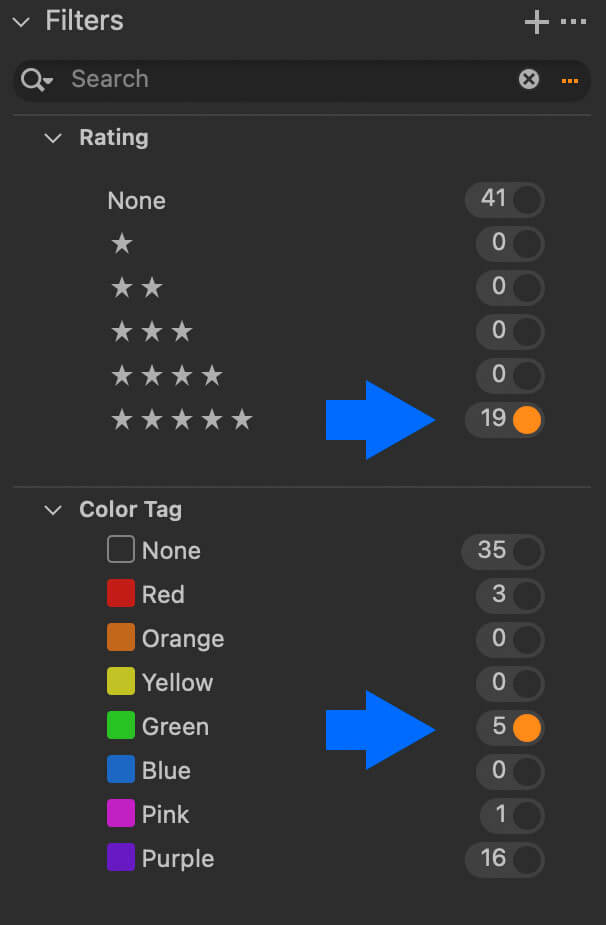
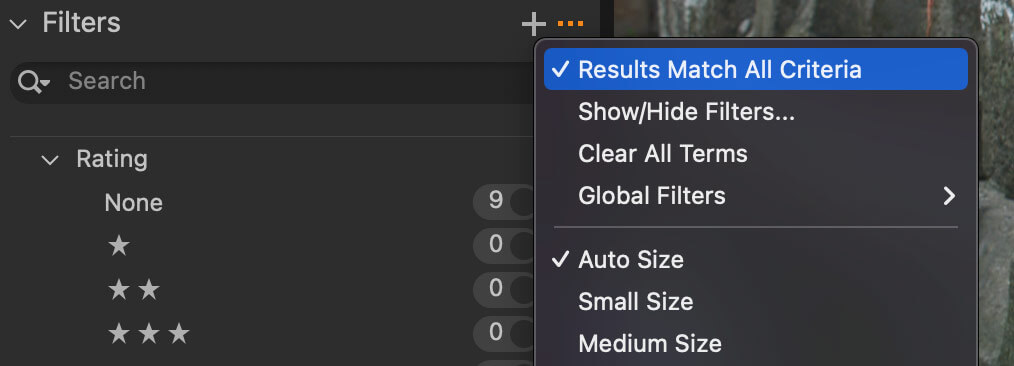
For example, you can filter images by rating and color tag. Or add some keywords to the search. BTW, in Filters preferences, you can set the rule for the multiple criteria search:
3. Apply Warm-Cool Contrast with Luminosity Masks
Warm-cool contrast works excellently to enhance your image perception. When you have a strict warm-cool contrast on an image, viewers can evaluate the picture faster and with less effort. This simplicity of perception makes it easier to recognize objects on an image and understand the general plot. Our brain just loves such warm-cool contrasts!
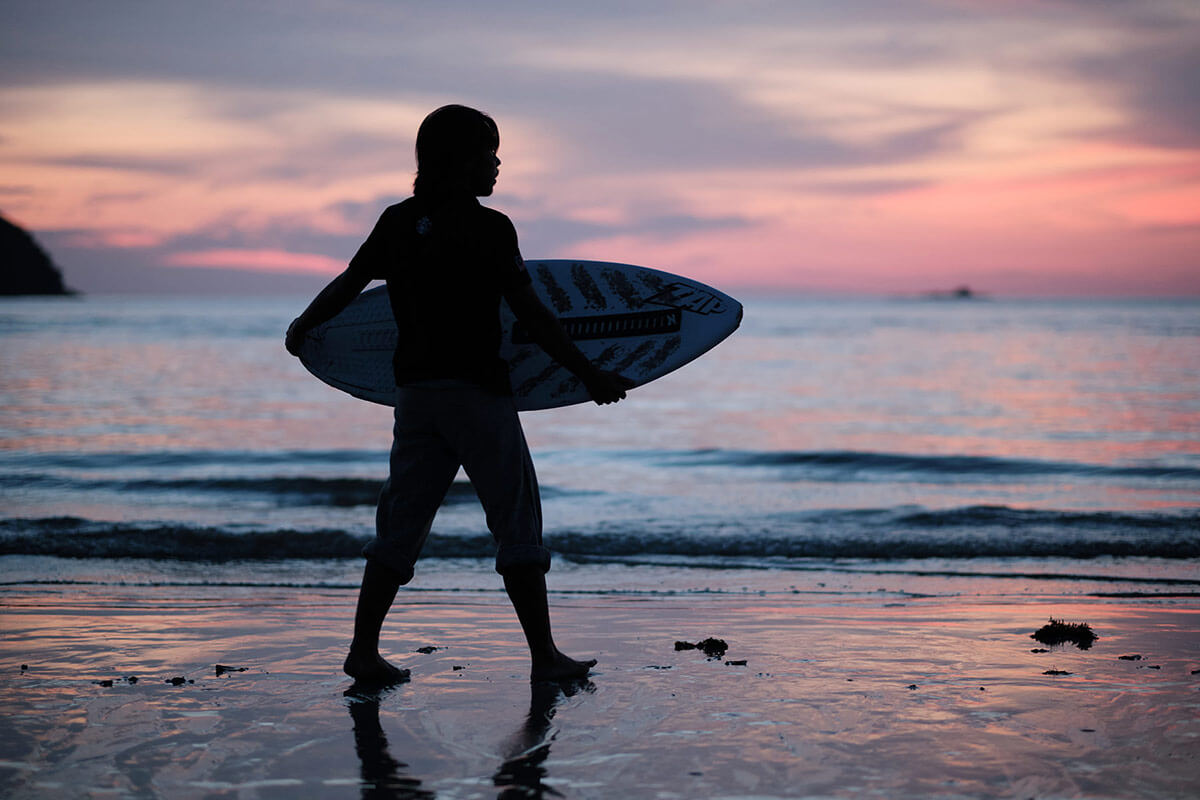
One of the ways to apply warm-cool contrast in Capture One is luminosity masks. Let’s take this image:
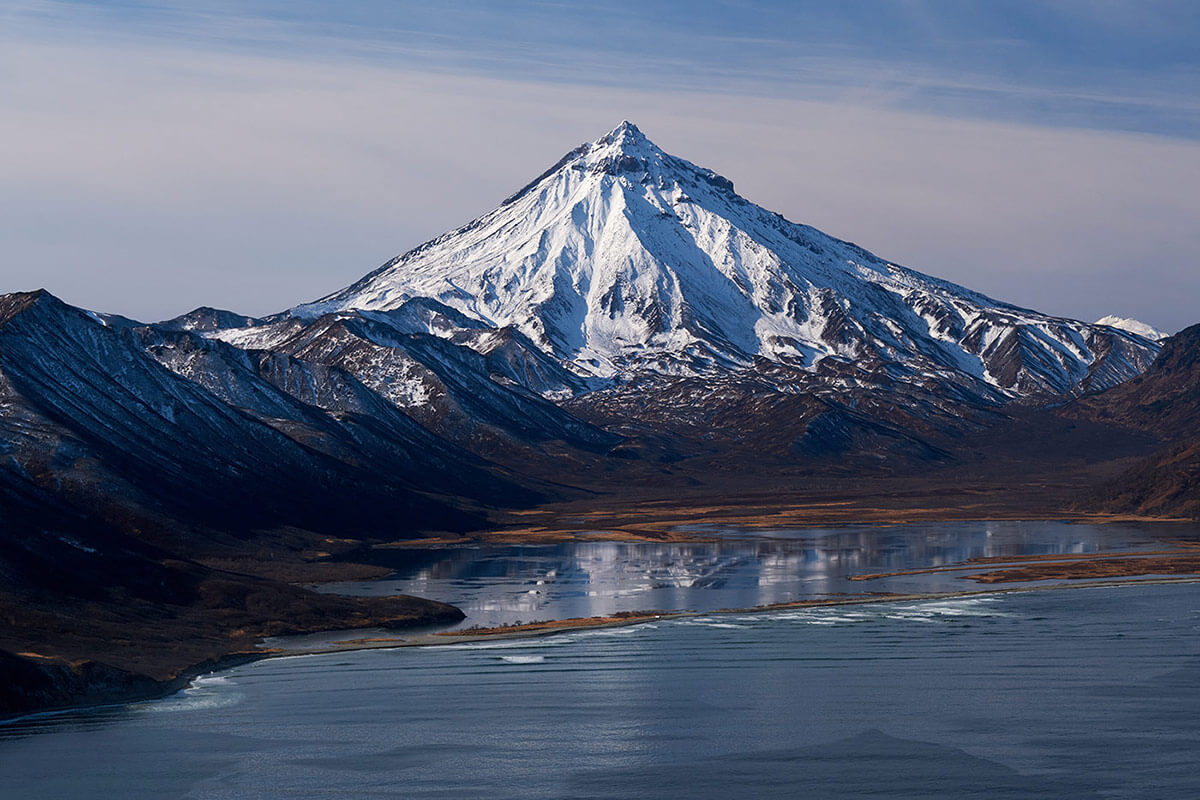
It already has a cool component of the contrast, so we only need to make some areas a bit warmer. We’re going to create a new filled layer and apply Luma Range to remove dark areas from the mask:

Now, you’re free to choose a tool to use. You can easily make this area warmer by increasing WB temperature or applying some color toning with Color Balance:

BTW, here you can learn how to use warm-cool contrast to enhance your iPhone shots in Capture One.
2. Copy and Apply Adjustments in a Single Click
Capture One offers a shortcut that allows you to copy and apply all the image adjustments in a single click. Here is how it works:
First, find the Copy and Apply Adjustments shortcut and assign a key combination to it.
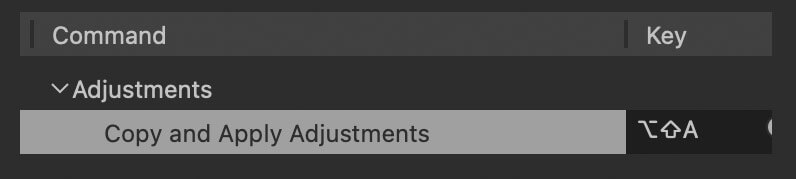
Make sure to include the Shift key in the shortcut!
Otherwise, it will require more actions from you to apply the adjustments.
Now, edit an image and select all the photos you wish to apply the same adjustments to.

Use the Copy and Apply Adjustments shortcut to apply the editing from the main image to all the selected images.

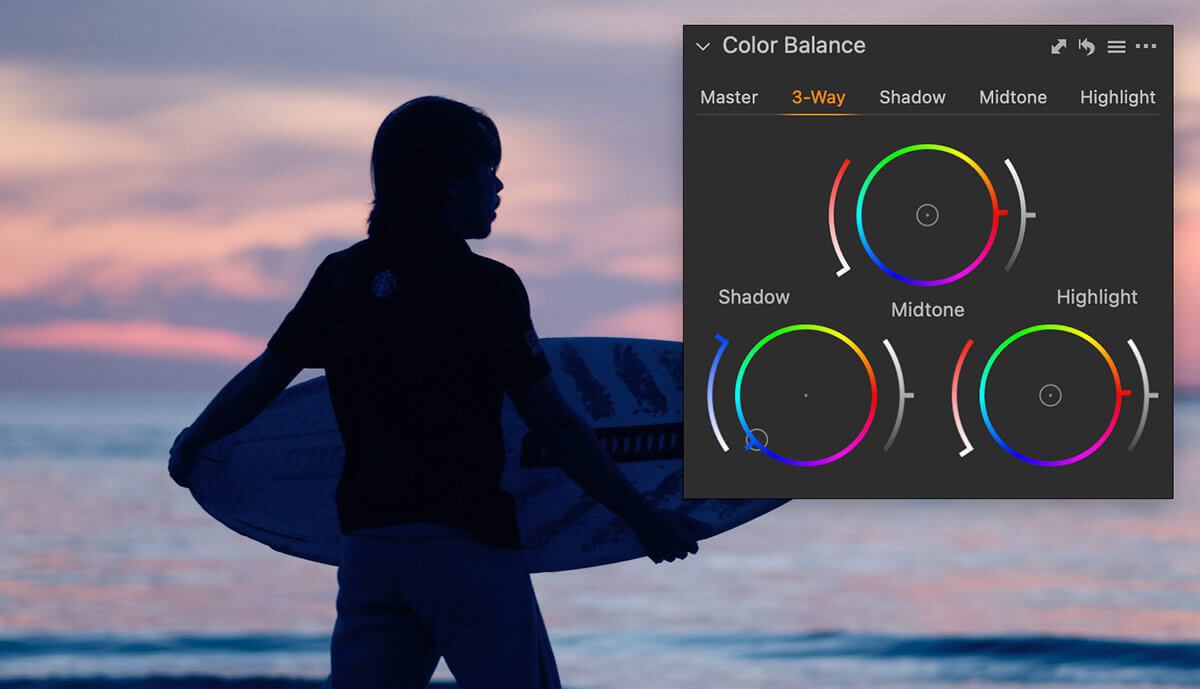
1. Adjusting Lightness for Better Color Grading
Color Balance has separate brightness sliders for Shadow, Midtone, and Highlight.
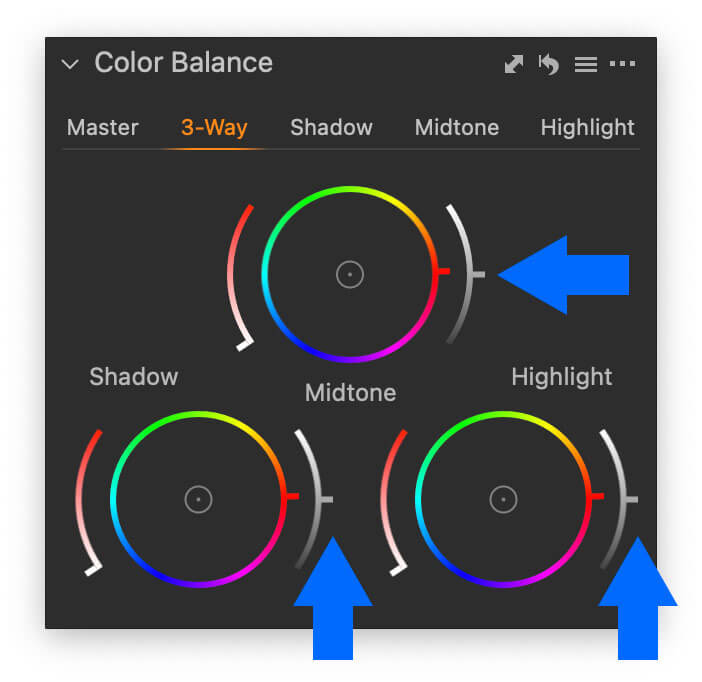
At first glance, they are pretty simplistic, compared to the HDR tool, but this dull effect fits color grading tasks perfectly. You can’t have an intense color in very bright or dark areas of an image; there is just no room left for it. Thus, it helps if you correct lightness before proceeding to color grading. Here is how it works in practice; we have an image with a massive dark area:
Let’s add some color toning to shadows in Color Balance:
The result is barely noticeable in the darkest areas. Now, let’s increase lightness:
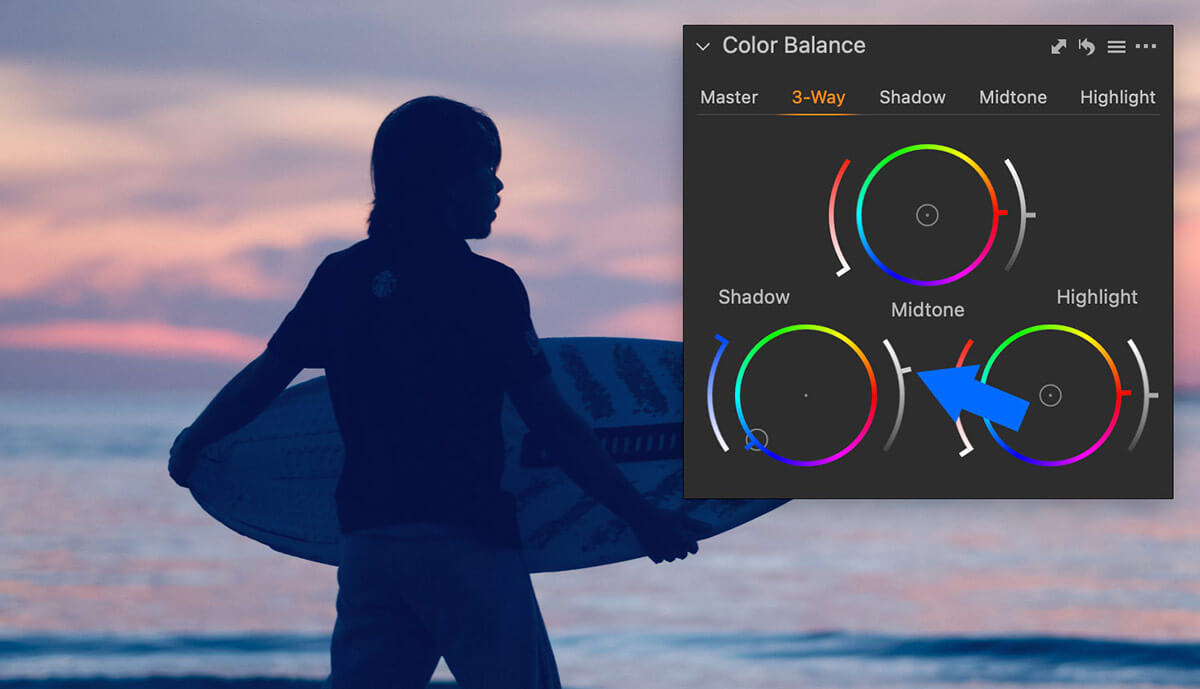
Color immediately appears on an image!
More Information
If you’re interesting in learning more Capture One tips, you can download four chapters from the Capture One Hidden Features ebook free of charge!

From these four chapters, you’ll learn how to draw two gradients on a single layer, use mask inversion in editing, and set up must-have shortcuts. Also, I’ll show you how to create macro commands to copy everything except layers and run Edit in Photoshop in a single click.
Download Free Chapters
Get 28% OFF the eBook + Styles Bundle – Using the code PA10 you can save 28% on the eBook bundle with Pro Color Grading Style Set.
About Alex
 Alexander Svet is a photographer and Capture One trainer based in Tallinn, Estonia. As a professional photographer, Alexander has been using Capture One for 16 years, since Capture One version 3. Eight years ago, Alexander started a blog about Capture One — AlexOnRAW, which now has more than 30 000 followers and newsletter subscribers.
