Layer masks are a great asset to Photoshop and can open up an entire new world of photo editing – once you know how to use them. If you already understand the concept of layers, you know that layers can be adjusted in transparency – referred to as the opacity level in Photoshop. This makes the top layer invisible to a certain extent and allows the bottom layer to be seen. This is adjusted using a percentage rate – 90% opacity would be barely see-through, while 10% opacity would make the layer virtually invisible.
Wouldn’t it be great to select which areas of your layer you want transparent, and which remain visible?
This is entirely achievable with layer masks by adding one to your layer – which you can then use your brush tool to paint on. A black brush will remove parts of your layer that you don’t want visible, and a white brush will do the opposite – in other words, it will reduce the transparency.
How Layer Masks Work
To serve as a visual, I have a white fill layer covered by a black layer. You can’t see the white layer since it’s completely covered, so let’s get a mask on the top layer by pressing the “Add Layer Mask” icon (Figure 1).
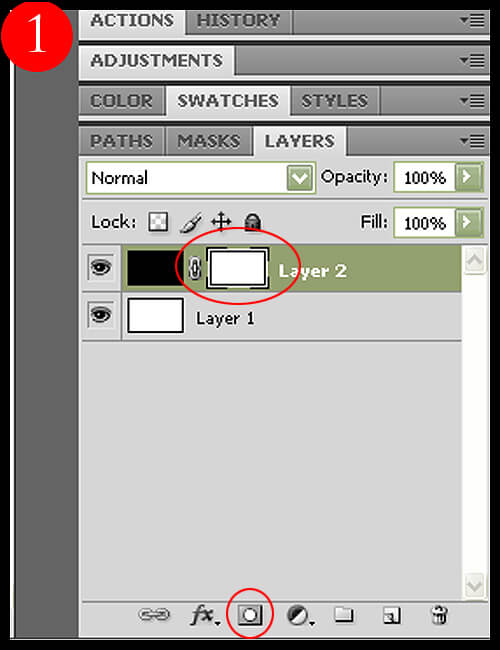
Tip: Always make sure the layer mask icon is highlighted in your layer’s palette so that you’re brushing the mask, and NOT the fill layer.
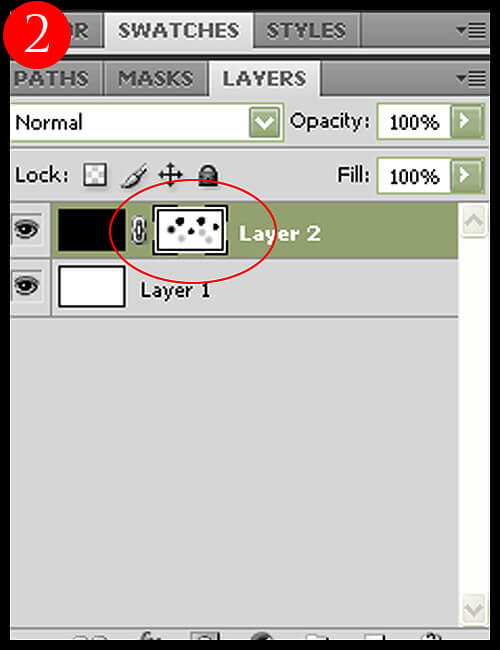
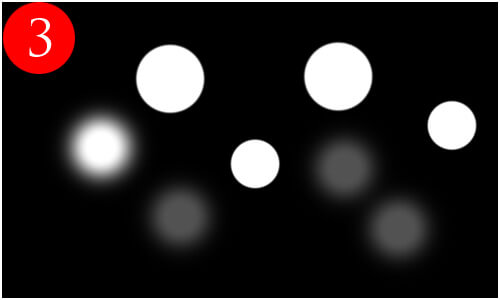
Now I’ll use my brush – with varying degrees of opacity and hardness – to punch holes in the top layer (Figure 2) so that the bottom (white) layer can be seen (Figure 3).
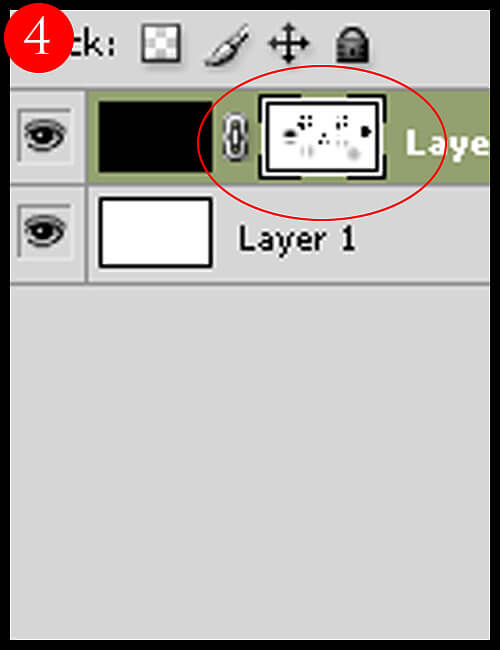
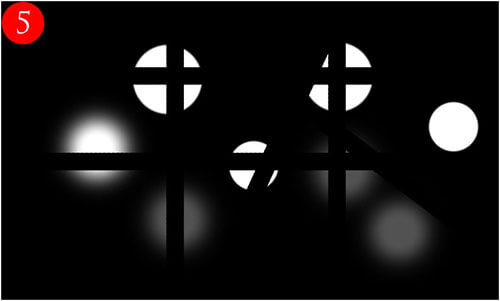
Finally, I’ll reverse what I just did by using a white brush to bring back (lower the transparency) of the top layer (Figures 4 and 5). For this, I’m using a smaller brush with 100% opacity and hardness, set to white.
Obviously, not many photographers would actually do this to their photo, but it’s an illustrative way to show how the mask works.
Why Use Masks?
So why use a mask at all? Why not just use your eraser tool the same way as your brush tool and remove parts of the layer that way?
For one, the layer masks are completely reversible. For example, let’s say you added a saturation layer and made it a bit too transparent in a certain area – you can easily undo this by switching your brush to white and going over the blackened areas of the mask. Or, you can simply remove the layer mask all together and start from scratch. If you were just using your eraser tool on the layer, you wouldn’t be able to revisit it later and bring back what you took away.
Additionally, you can duplicate a mask for another layer. Let’s say that you want to do many edits to only a very specific part of your image – for example, the eyes of a portrait. You spent much time tracing them out with your brush tool on a saturation mask, but now want to add a sharpening effect ONLY to the eyes. Instead of repeating this process, simply add a sharpening layer and drag and drop (while holding the ALT key) the mask onto your new layer – instant mask!
You can also use your gradient tool on your layer mask, which is fantastic for a true gradual transition between your layers.
Examples of Masks in Use
Here are a few ideas on where you may find layer masks useful – this will help put masks into context a bit and give you some dark room scenarios:
1. You duplicated your photo layer and sharpened, but want to mask out (remove) the sharpening from the out-of-focus areas.
2. You added a warming filter that looks great with green foliage, but overkill on the yellow tones already in your image – you use a low-opacity brush to gradually remove the filter from the yellow areas of your photo.
3. You want to decrease the exposure on the edges, but not in the center – and you want the transition to be seamless. You add a layer mask to a decreased exposure layer, and use your gradient tool to gradually increase the exposure (i.e. making this layer less visible) from the edges to the center.
