Photographing landscapes can be a difficult subject to capture – the lack of control over your subject is quite high, and oftentimes you may find yourself compensating in the digital dark room.
If your landscape images sometimes lack that wow factor – that stand-out quality in tones and color – you may need to increase your tonal range. This will help give your photos that professional-quality level of clarity and detail.
Below are three common techniques photographers use to remove the muddy quality to their tones and create crisp, clear, and powerful images.
Dodging and Burning
A darkroom method that has been replicated for Photoshop is dodging and burning – which is a fantastic way to increase your tonal range and selectively decide what part of your images can use improvement.
We’ve already written a short guide on dodging and burning – including what the tools are and how to use them – right here: Dodge and Burn to Correct Exposure.
You should, however, be very conservative with this tool as it can easily give you blown highlights or blocked shadows – keep an eye on your histogram and if you start to see mass amount of data being lost, scale back on your editing.
Levels
The levels tool is an incredible way to increase your tonal range and take the cloudiness out of an image, allowing you to really make you a photo stand out – whether it’s a black/white or a color photo.
When looking at the levels slider, you’ll see three triangles – black represents your dark tones, white for whites, and gray for the mid tones.
By adjusting these sliders, you can eliminate any cloudiness to your image by making sure your photo uses the full spectrum of tones – from dark to light. Basically what you’re doing is taking your darkest tones and making them darker, and making any bright tones you have brighter.
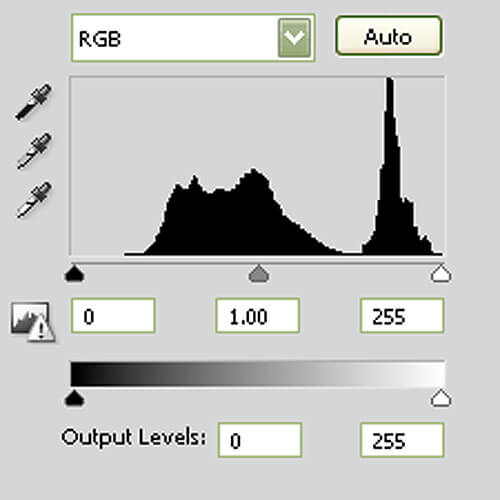
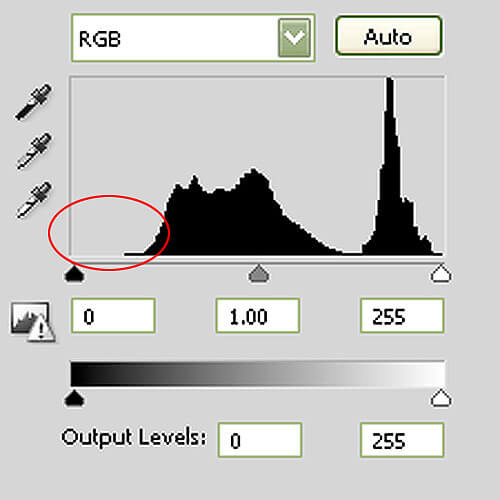
This method works best when your levels histogram has gaps on either end – this means that no tones are present at the extreme ends of your tonal range. In the example image, note the huge gap in the front of the histogram – or the dark tones – which means that the darkest tone in your image starts pretty far away from the darkest tone possible.
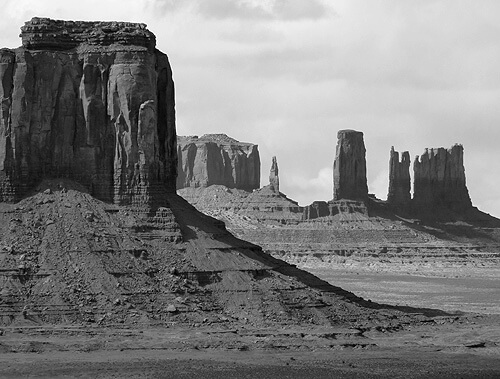
When you look at the corresponding image to this histogram, you can see that the tones are rather muddy and are not using the full tonal range possible. I chose to use a black and white image to illustrate the differences in tones, but the same method applies to color images as well.
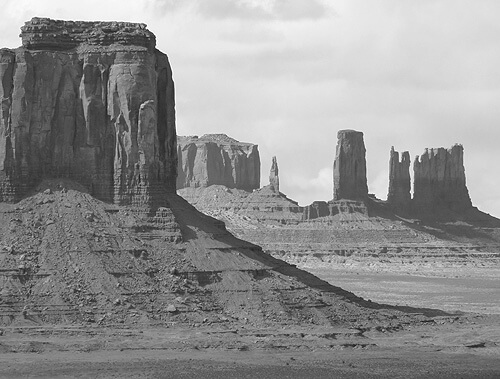
Photo by Frank Kovalchek
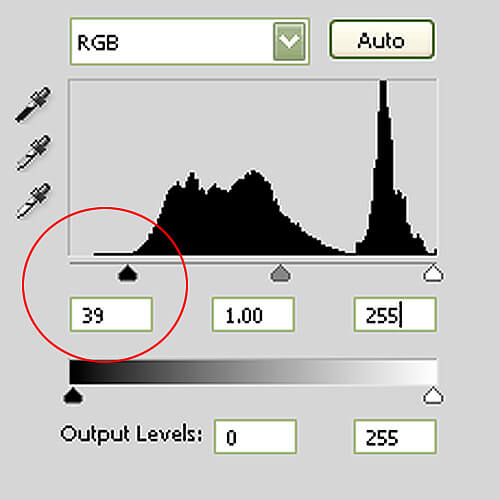
However, when I drag my dark point slider over to where the histogram actually starts, you can see a huge difference in the tonal range of the image. Note how the number for the dark tone slider changed from 0 to 39 and how this change affected the image.
If my histogram here had a huge gap in the highlights, I would do the same for that slider as well. The goal is to make sure that your sliders hug around your histogram – then you can adjust the mid tone slider as necessary to your liking (taking care not to damage your image with blown highlights or blocked shadows).
Note: Adjust your levels on a separate adjustment layer, not on the actual photo itself. This will allow you to mask out areas you need to scale back on, and will also let you come back and readjust your levels at any time.
HDR
HDR (high dynamic range) is best suited for high-contrast situations – that is, a large disparity between your darkest darks and brightest whites. It’s also a fantastic way to capture dramatic lighting where it’s difficult to photograph the full detail of your scene – such as with sunsets.
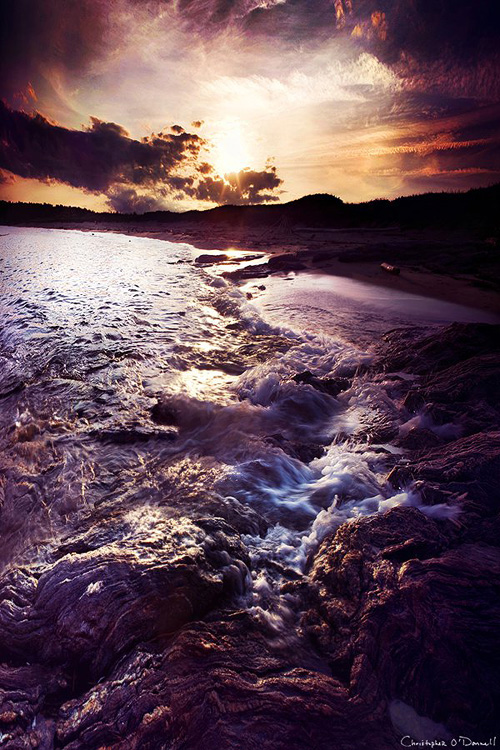
Photo by Christopher O’Donnell
For more information on how HDR can benefit your photography, make sure to read this fantastic article by Joseph Rossbach on how to achieve natural-looking HDR landscapes.
Although HDR is an incredible way to capture the full tonal range of a landscape photo, there are limitations and obstacles. The main problem is ghosting, which is when you have a moving subject that looks different between your multiple exposures. This can cause problems in the blending process.
Most HDR software allows you to correct ghosting within the program, but if you’re blending exposures manually or if your software can’t handle it, you’ll have to spend some quality time with your clone brush and patch tool. Even with this added work, the end result is worth the effort.
Also note that you can achieve a similar HDR effect if you’re working with a RAW image – not as dynamic as going the HDR route above, but it allows you to expand the tonal range a bit by just using one image instead of blending multiple. A benefit of this compared to the multiple-exposure method is that it will eliminate any ghosting (since there is no difference between exposures).
You can increase your tonal range by either editing directly in RAW or by blending three different images together using layer masks – your original image, one with a decreased exposure, and one with increased exposure. Just make sure you don’t increase/decrease by more than two full stops as that is the limit of RAW exposure adjustments.
The three methods listed above are not exclusive – you can pursue other avenues to increase your landscape tonal range, and you can also use a unique combination of the methods above.
One tip I have to offer is always to try and shoot in RAW format – a RAW editor is a powerful tool that allows you to perform many traditional edits you can find in Photoshop, only in a much more accurate and less damaging way.
